Why and how to create and work with a disk image (e.g. .dmg) with the (to be former) content of a folder.
Why
To create a digital archive of contents that:
- Is only ONE file (.dmg) instead of hundred, thousands, tens- to maybe even hundred of thousands of small files (if dealing with e.g. software sources or forensics test materials……)
- Easier and quicker to deal with one single file than lots of files.
- Better for handling big Dropbox-handled systems

- Excludes files from regular Spotlight searches. Ok, this can be viewed as both pros and cons but in case of more readily access to content in also searches, look at some digital asset management solution like NeoFinder. More in our Digital Asset Management (DAM) section.
- Easy TO access actual content and files by simply mount an image


How
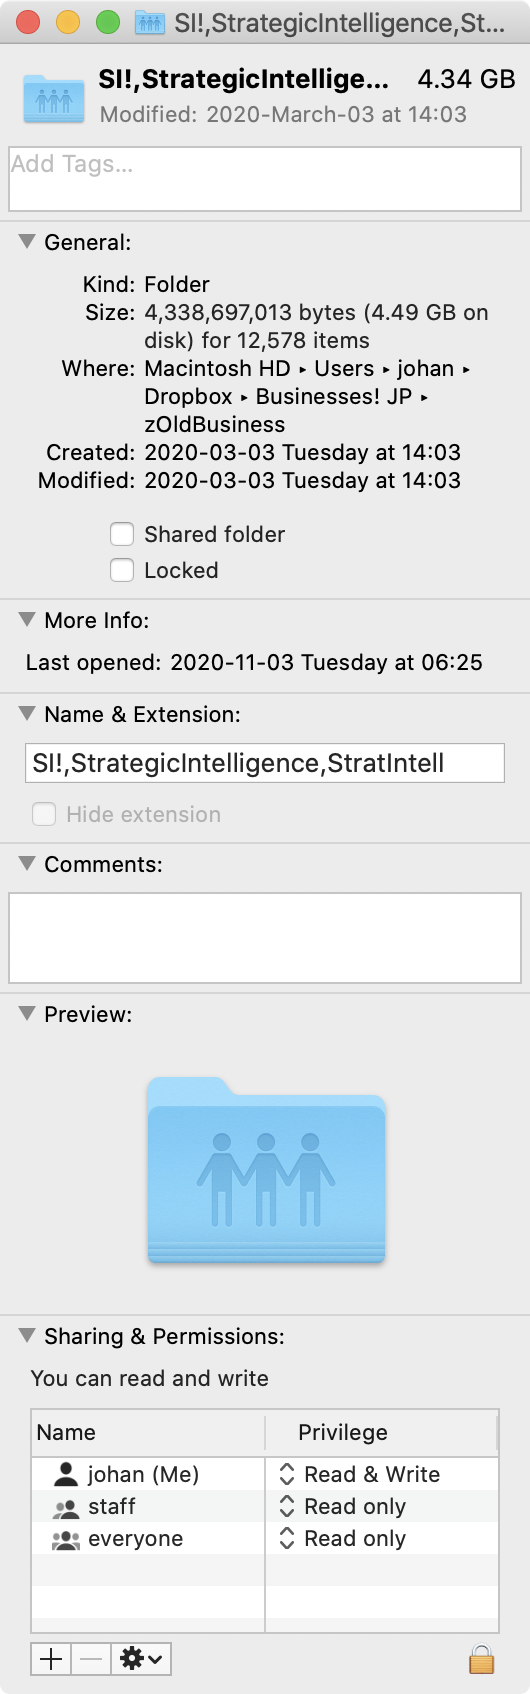
- Do Show Info on folder ‘X’, and (this is to create at least some small guidance to content within the image to be created)
- Take a screenshot of info dialog
- Copy text of size of data (e.g. 4,338,697,013 bytes (4.49 GB on disk) for 12,578 items)
- Add text to screenshot
- Example of intended result:
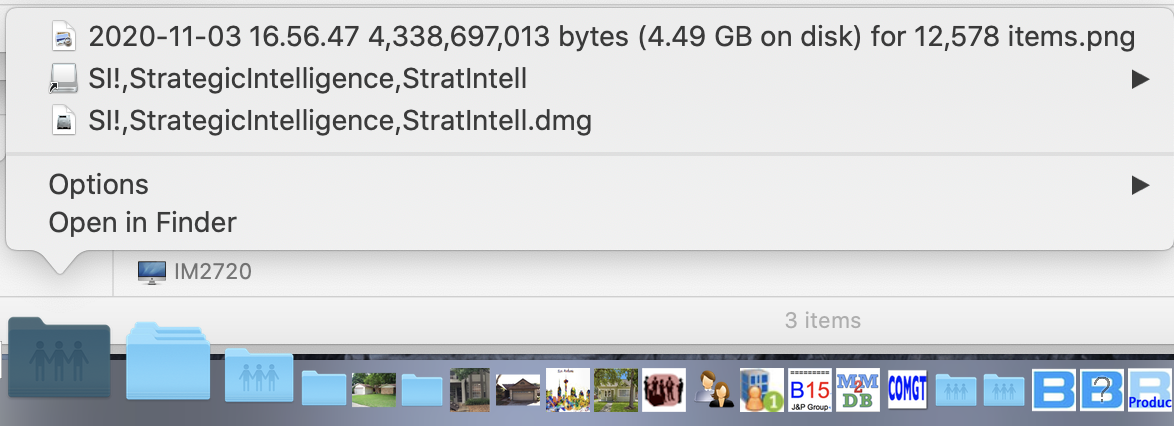
‘2020-11-03 16.56.47 4,338,697,013 bytes (4.49 GB on disk) for 12,578 items.png’
- Actually make an image from folder ‘X’ content
- NOTE: IF making it read-write, you can continue to edit content, including adding screenshot from above onto the image (after mounting it), nice to have part of image as some indication of ‘dimensions’ of total content.
- Resulting in a file ‘X.dmg’
- Can use macOS Disk Utility or J&P’s Make Image from Folder – script
- VERIFY image contains content of folder ‘X’
- Mount image, makes sure it opens fine
- Look at content of mounted volume, if really concerned, use some tool to look at details
- Consider copying screenshot from first step onto mounted volume.
- Make an alias of MOUNTED image root
- Remove contents INSIDE folder ‘X’
- Not removing the actual folder to avoid breaking any aliases to it.
- Move new content into folder ‘X’
- Screenshot file from first step.
- Image file (‘X.dmg’)
- Alias file of mounted volume
- Resulting into a new folder with content (e.g.):
- DONE. Result is a folder – same as originally, thus not breaking any alias/references, like possibly in Dock. E.g.:
- Folder content:
- And even alias into Volume works (as long as volume is mounted, of course)
(Note that this volume DO have screenshot file in both the online folder and the mounted volume/inside the image. Which is read-write.)
- Folder content: